|
The AERMOD air dispersion model allows users to input time-varying concentration data to represent background sources to be added to the model’s calculations. This can be done by directly adding background concentrations to modeled pollutant concentrations or, in the case of nitrogen dioxide (NO2), by adding background ozone or NOx concentrations to assist in estimating how much NO2 is formed through chemical transformation.
In its most detailed state, AERMOD can read hourly background concentration values for specific dates and times corresponding to the modeled run period. For AERMOD to read this data, the modeler must first create the data input file.

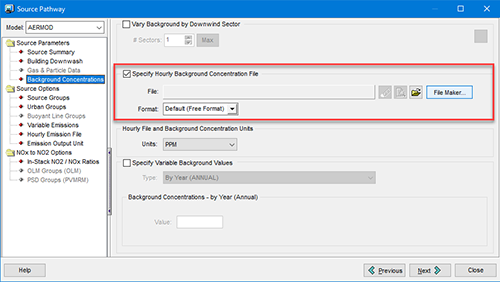
Hourly Background Concentration File Input in AERMOD View’s Source Pathway
Enter the Concentration File Maker utility in AERMOD View which assists users in building a free-formatted data file for easy input to AERMOD.

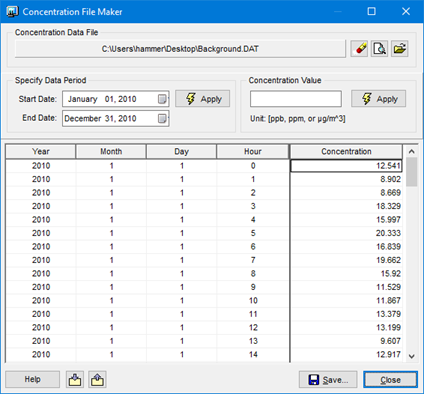
Follow the steps below to use the Concentration File Maker utility:
Step 1: From the Specify Data Period panel, select the Start Date and End Date for the file. Click the  button, and the table will automatically populate. button, and the table will automatically populate.
Step 2: Type in concentration values to the Concentration column as desired.
Step 3: To apply the same value to multiple rows at once, highlight the hour rows to which you wish to apply identical concentrations. You may select multiple rows in sequence by pressing down the Shift key or press the Ctrl key to make disjointed selections of hours. You can also select all rows by pressing the Ctrl+Shift+End keys.
Step 4: After selecting the desired rows, specify the concentration value in the Concentration Value panel. Click the  button to apply this value to the selected hours. button to apply this value to the selected hours.
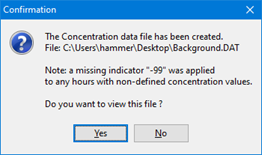
Step 5: If data is missing for a specific hour, the row can be left blank. The utility will automatically insert a missing indicator value of -99 for these unspecified hours.
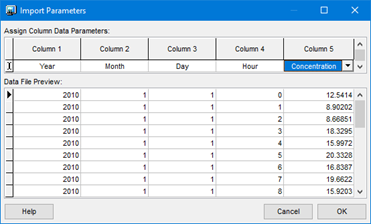
Step 6: To import data from an existing file (e.g., CSV, Excel, TXT), use the  button. After selecting the file, the Import Parameters dialog will allow you specify the variables for import. button. After selecting the file, the Import Parameters dialog will allow you specify the variables for import.

Step 7: Save the file by selecting the  button. The Save As dialog will open allowing you to specify a file name and location to save the file button. The Save As dialog will open allowing you to specify a file name and location to save the file
Step 8: Once saved, you can choose to view the file from the Confirmation dialog.

The file can be inserted anywhere an hourly concentration data file is needed such as the Source Pathway’s Background Concentrations or the Control Pathway’s NOx to NO2 Options.
After creating the file, it can be reopened in the utility via the Concentration Data File field at the top of the dialog. This makes it easy to edit existing data files.

|


